Fixing a Toshiba External Hard Drive
Author’s Note! This article has been imported from my previous website. I wanted to preserve all of the old content as many people have found some value in it. There may be some broken links and or formatting issues. If something isn’t right, please let me know and I’ll do my best to make an update.
All’s well that ends well, but for a moment, I was rather concerned for the fate of basically every photo I had ever taken. And while I did some rather foolish things recently, at least I was able to remedy the situation. Perhaps, this article will help others that have done something ruinous to their external hard drives.
Back Story
Long story short: I needed a more powerful computer to run various CAD programs, render videos and what not, so I purchased a friend’s un-used (but rather powerful) extra computer. I upgraded the memory, case, and hard drive. While transplanting the internals to the new case, I needed to wire up the front panel USB ports:
Now a smart, more careful, less-foolish version of me would have simply downloaded the motherboard manual, looked up the pin configurations for the USB wires, and proceeded to connect the plugs correctly. (You see where this is going?) Rather than that, I thought I could just copy the color coding from an existing USB breakout:
On closer inspection, and of course, after the horror to come, you will see that the wires are backwards. I’m assuming the motherboard is correct here:
So, the power wire is where the ground wire is, and the ground wire is where the power wire is. This doesn’t make a material difference, because the wires simply connect USB pins to connector pins. My mistake was following the coloring of the wires to model my new connections.
Can we take a moment and agree that, all else being equal, it’s REALLY STUPID to wire things with colored wires that mean something, and not even print a label on the connector indicating the changes? I can’t tell you how frustrating it is to open up an electrical box and see a white wire tied into a black wire, to run a pig tail or something, or a switched wired backwards. The colors matter! If you are going to do something stupid, at least label the wires so that the next person doesn’t make assumptions.
The Disaster
And so I did make an assumption, and it made an ass out of me and my hard drive. Sadly, I now must default to thinking that most things are built wrong and poorly, and to double-check wiring. (A good lesson perhaps).
So, I plug in my hard drive to download my pictures to the new computer. This, also, is a lesson learned: never have all of your precious data in just one place.
ZAP!
Arcs to the PC chassis from the edge of the USB plug. I’m surprised the computer was fine. But that seemed VERY WRONG. I plug it into my other computer: nothing. A different USB port: nothing. This is getting bad. I also check the front port with a garbage keyboard I had laying around: sparks, destroyed keyboard.
Ok, so the USB is wrong. This is when I check the mother board manual, realize my foolishness, and fix the USB problem. Great. Now, how do recover my pictures?!
The Fix
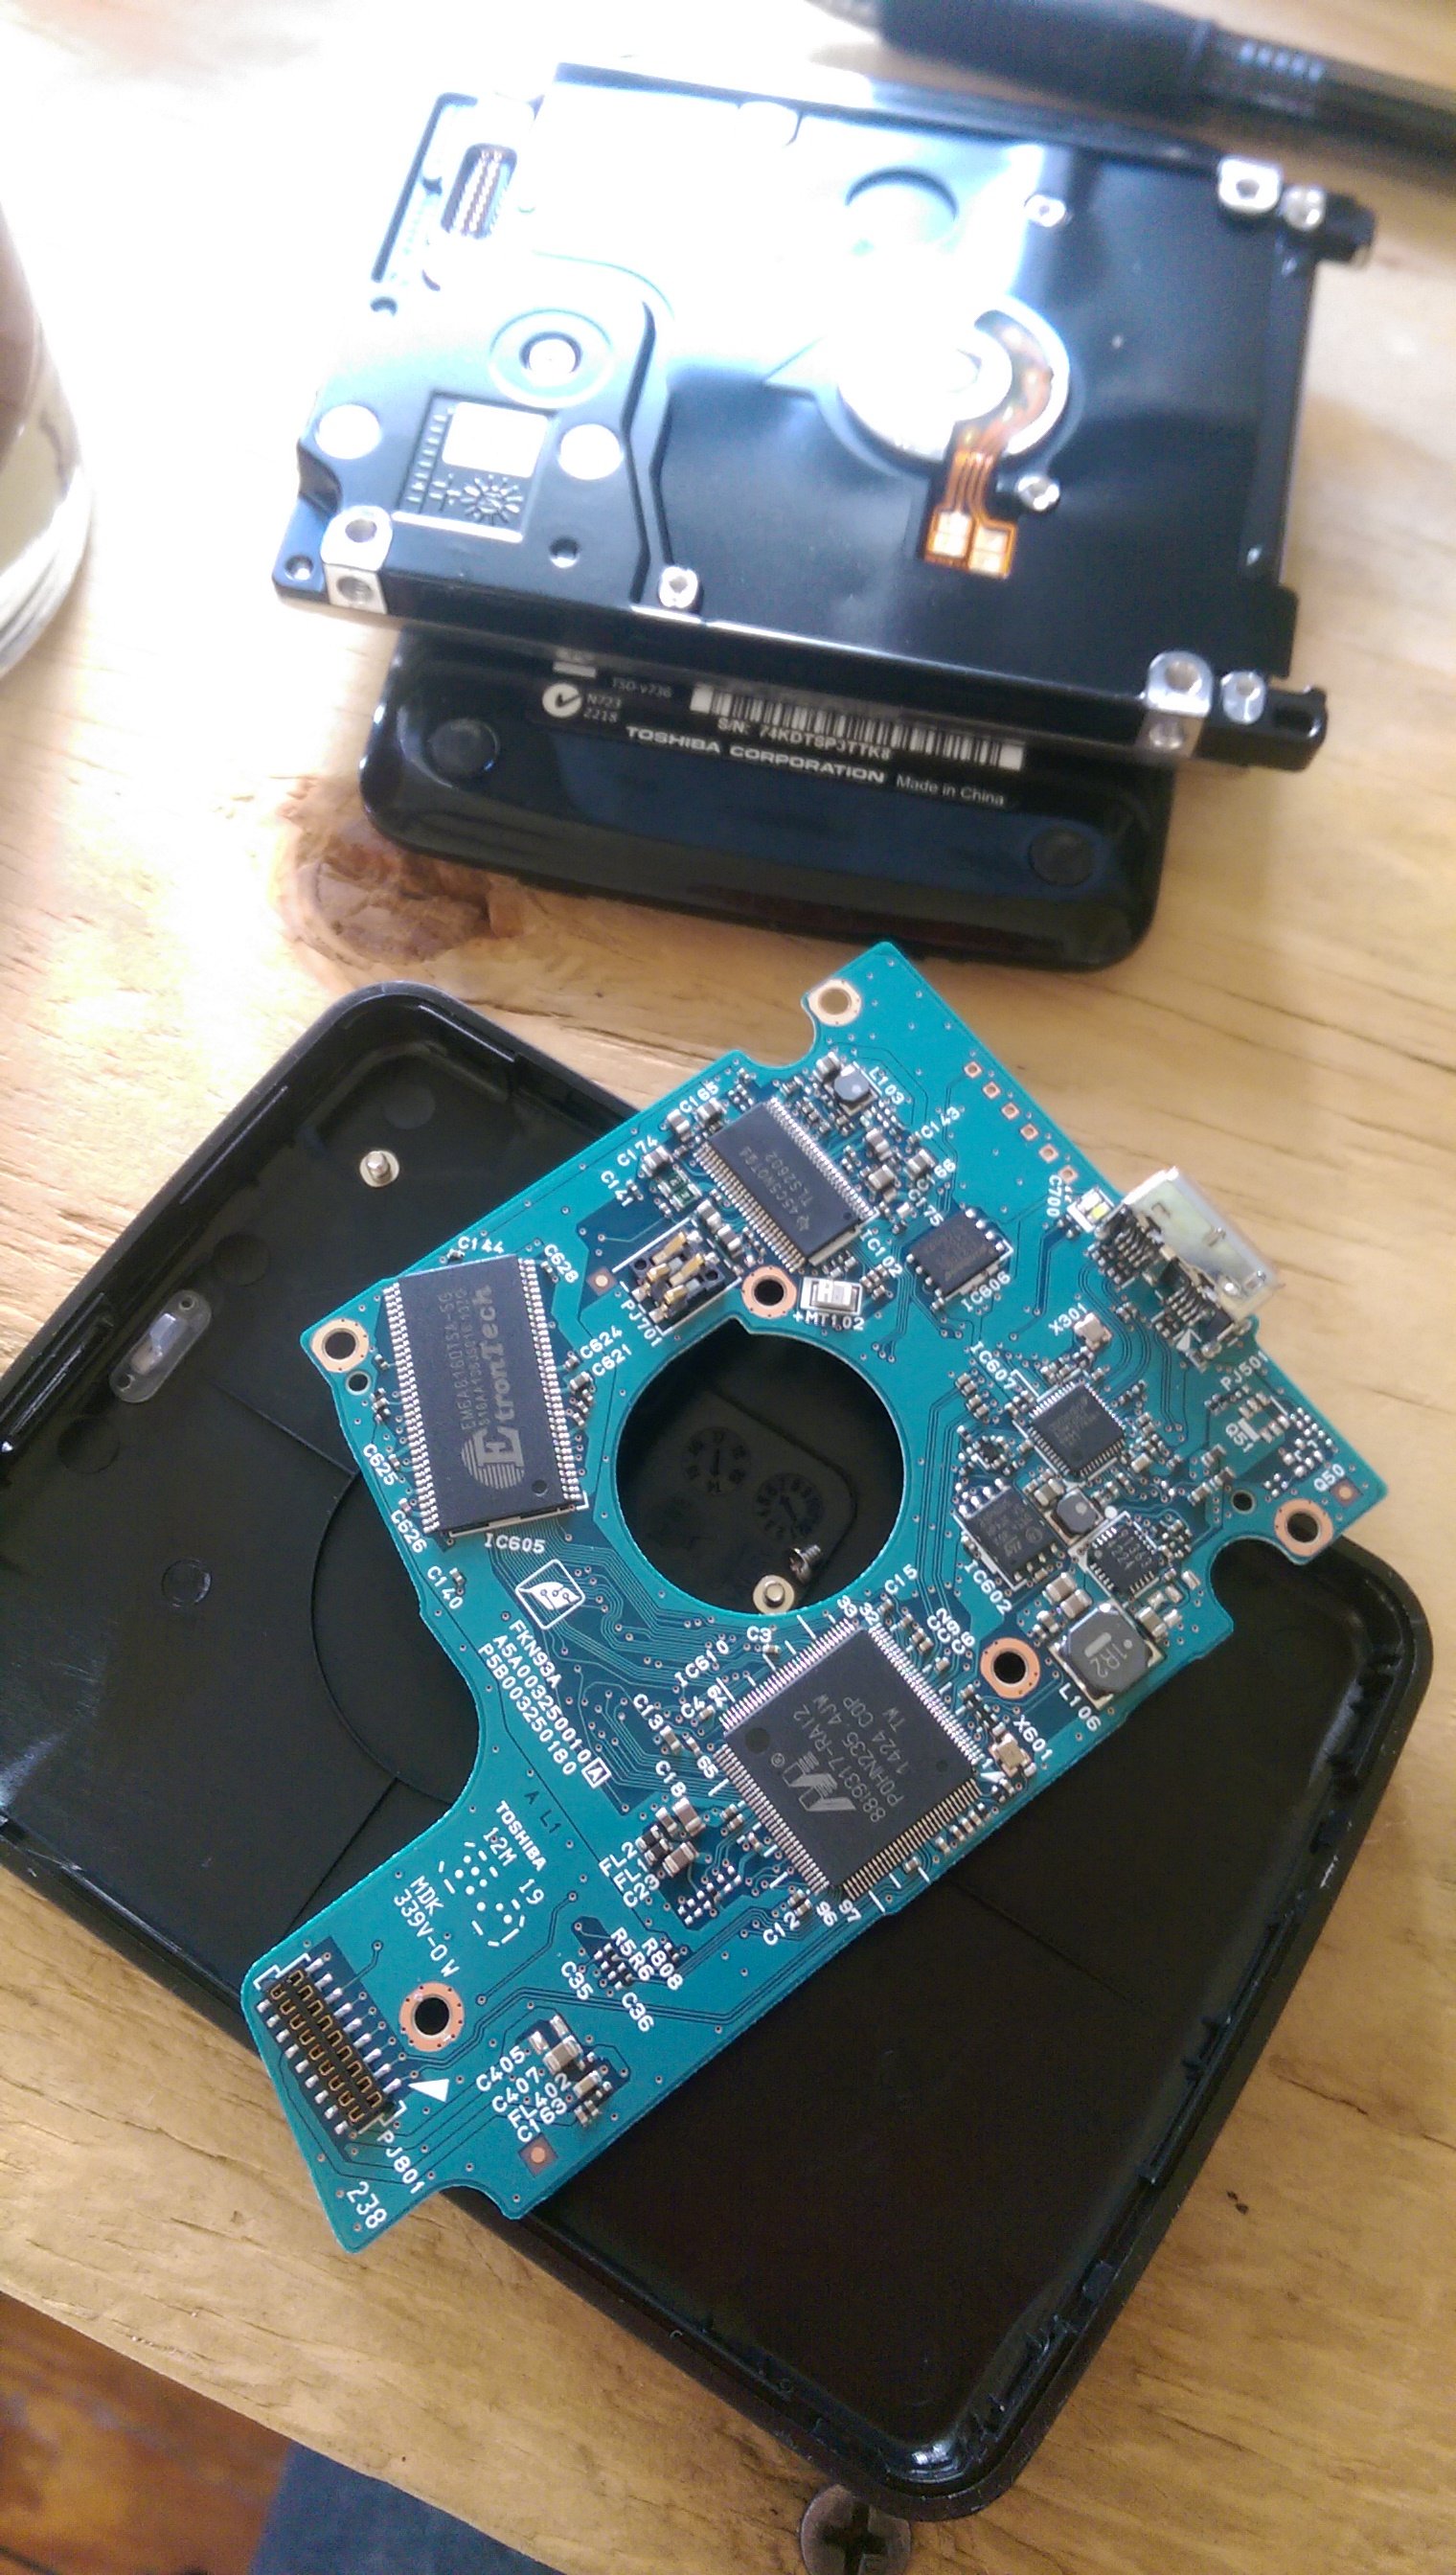
The thought of sending the hard drive to some po-dunk, out-sourced, who-knows-what repair center that Toshiba might suggest, was out of the question. Just the thought of having to call and explain the situation to tech support made me ill. I figured I could fix it myself with the right parts. So, I ordered up an exact copy of the same hard drive, popped open the case and sure enough, I could just un-screw and swap the controller boards:
My thought is that something must have fried on the controller board, and switching them should get things to work. I hoped that the short didn’t make it into the drive itself. After switching the boards, the light did turn on, and I could hear spinning, but the hard drive was not recognized by any OS. This was starting to look grim.
There must have been some sort of configuration on the board that was tied to the hard drive or data itself. I was pretty much at a loss at this point. I turned to the internet and discovered the ultra helpful folks at Data Medics who identified a specific ROM chip that needed to be moved from the old, fried board to the new, functional board. Check out the forum thread for all the details.
Apparently, and assuming this ROM chip wasn’t also shorted, all I needed to do was remove both chips and solder the original into the place of the new. It is a very small chip, measuring only 5mm x 4mm:
Let me be explicit here about the details:
For the TOSHIBA HDTC705XK3A1 which is a 500GB USB 3.0 External Disk Drive
The ROM chip is labeled IC602 on the controller board.
Moving the Chip
This was a pretty harrowing experience. I was told that if I heated up the chip too much, the data would be lost, and then any data on the disk would be un-recoverable. The best method would be to use a jet of hot air from a re-work station, to heat up the chip, pop it off and then with some flux, repeat the procedure to attach the chip to its new home.
Here is the setup I used:
I used 400C as the temperature, but don’t take this as authoritative. I got to this number by watching YouTube videos, and reading about how “hotter is better” to the extent you can quickly heat up the solder to melting before saturating the chip.
With some practice on the old board, I was able to remove the ROM chip and install it safely into the new control board:
I’m happy to say that after attaching the control board, and connecting it, the hard drive worked correctly, and I was able to quickly download the data!
Lessons Learned
These are obvious:
Don’t trust the color of wires– always double check your connections.
Back up sensitive data in at least two places. Dropbox gives you like a TB for $10 bucks a month. No excuse.